- Here CyanogenMod meant Lineage OS
- Rooting will void warrenty and may brick device.
A basic and the bulletproof guide for the Redmi note 3: Unlock bootloader, root redmi note 3 (kenzo) and installing TWRP and flashing SuperSu zip. Also some instruction on switching from Global MIUI ROM to Developer ROM without unlocking the bootloader. When I tried unlocking its bootloader, the process made me frustrated and I’m sure I tried the thing like 20-30 times, But at last, it got unlocked and I flashed an official CyanogenMod 13 ROM and everything working smoothly and since the guide is here.
What you’ll learn in this guide.
- Unlocking Redmi Note 3 bootloader officially.
- Installing the TWRP on redmi note 3.
- Rotting Redmi note 3 with Twrp and SUperSu.
- Flashing a CyanogenMod ROM on redmi note 3.
Use the below quick links to jump to your desired guide.
Navigate the article
Unlocking bootloader of Redmi Note 3.
Psst! this is no quick-time process, that means you’ll have to ask MI to unlock permission. Update: Now it takes some hours to a few days to get unlock permission.
Bootloader Unlocking Timeline
Day 1: Apply
Apply at MIUI to get unlock permission for your device. Don’t hurry or worry, I have been there, you can trust me on this. It will take some patient but I assure you you’ll get your device’s bootloader unlocked and rooted, so you can flash any CM13/14 ROM, and do everything a rooted phone could ever do, I tried to sum up everything in one single article, come on guys, if this was helpful to you, like us on facebook.)
Meanwhile: Do this
A) Add information to your miui / MI account. Such as device name and miui version, this is the profile link where you need to enter this.
B) add the same MI account to the Redmi note 3 and enable find device. Let it be there for some time, or at least one day.
C) add a phone number to your MI account.
Day x: Unlock bootloader
when your unlock permission is granted head over to the page and download the MI unlock tool.
Bootloader Unlock process
Open your phone > about > miui version > tap several time to enable developer options. Now go to “developer options“ and enable the “OEM unlock” and “USB debugging“.
Step 1. Turn off your phone and boot into fastboot mode, (Power + Vol down key simultaneously).
Step 2. Open the MI unlock tool as administrator or just as you open any setup file by double clicking on it. Accept the rules and the terms of the MI unlock tool. Make sure you’re connected to the Internet on your laptop or computer.
Step 3. Sign in with your MI account, you can use your email and password, though, not necessarily.
Step 4. Make sure your phone is connected to the computer via USB cable while in fastboot mode. On a successful connection, you’ll see the “unlock” button, click on that and hold tight.
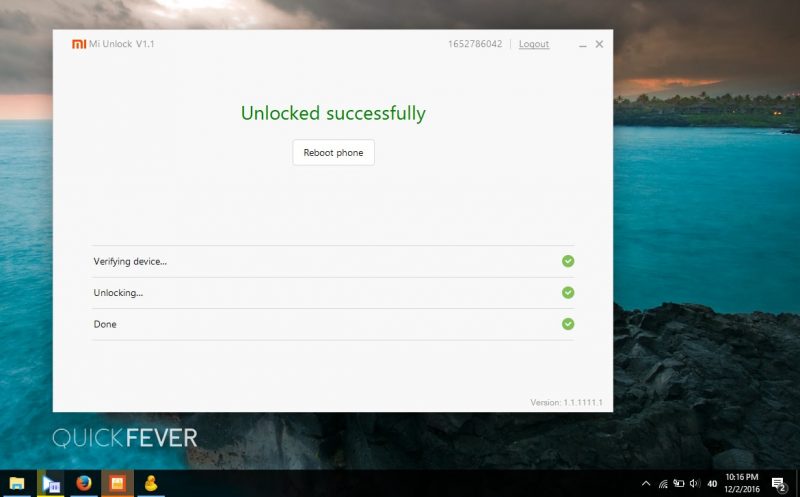
If everything goes right your phone now have unlocking bootloader, so you can flash a custom recovery like TWRP install supersu to root your phone.
(Personal case: I was successfully able to unlock my bootloader on the 2 December 2016, That means almost 2 days after I got unlock permission. As usual the MiUnlock tool didn’t worked and it failed at 50% several times).
Some of the known issues while Unlocking bootloader.
Error at 50%
1. 501 error = you’re not connected to the Internet.
2. Information on the device doesn’t match.
This is a common issue, you’ll have to wait for a day and try again or flash a developer ROM, is the problem persistence. Note that you’ll have to wait for some time after in case you flashed a beta ROM, you need to sign into your MI account on the Redmi note 3 phone and enable the find device option. (while there is no solid proof that find device setting should be turned on).
Flash Developer ROM without unlocking bootloader.
As the Developer (Beta) ROM is Marshmallow based, and I guess you either have MIUI 7 (Lollipop) or MIUI 8 Stable (Lollipop) so you first need to get and flash the “lollipop based Developer ROM using the Updater app, then download and flash the latest Developer MIUI ROM using the Updater app again.
Android 5 Beta ROM→ Android 5 Beta ROM
Also note that you don’t have to disable /enable driver signature enforcement on your Windows 10 computer some of the guide available on the Internet is spreading this hoax.
How to Root Redmi Note 3.
Once you have an unlocked bootloader, you can proceed for rooting it. For that purpose, you’ll need to install a custom recovery on the RN3 android phone to root it with SuperSu. The SuperSu is an application which should be flashed on your phone to gain root permission.
- You can get the TWRP recovery for redmi Note 3 phone here.
- Get the supersu.
Follow the next section to root your Redmi note 3 Phone with TWRP recovery.
Installing twrp on Redmi note 3.
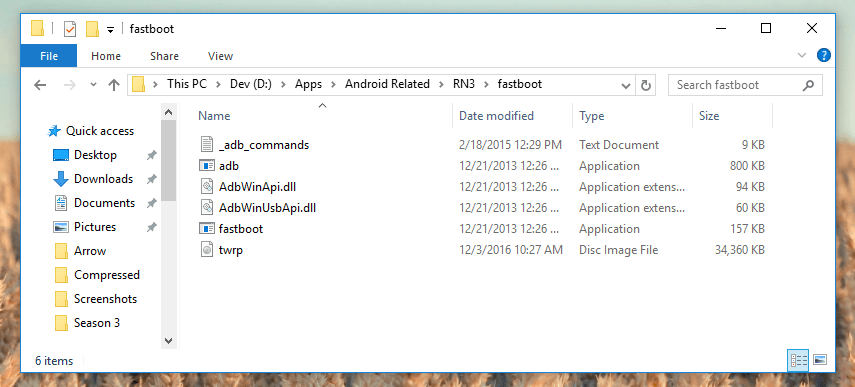
After saving the twrp image file, paste it inside the ADB & Fastboot Folder. You should rename it to just “twrp” for ease.
== Get ADB and fastboot zip (save and extract on your computer).
Step 1. Open your phone in the fastboot mode and connected to the computer using the USB cable. You’ll need to install ADB driver and the Fastboot zip files to flash the twrp.img on your phone.
Your folder should look like this.
Step 2. Right click in the white or black area and choose “open command prompt windows from here“, here is an image from an old guide.
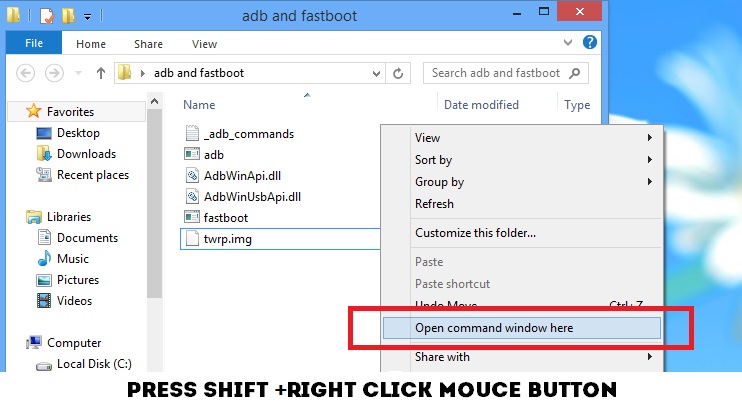
Step 3. Now the command prompt window will open, and you’ll need to type a few commands to install TWRP on the phone. Please note that handle this with care and do not type imaginary commands, this might do nasty things to your phone).
Type the following command to determine whether your phone is successfully connected to the computer.
fastboot devices
If you see some characters, this confirms that the phone is in fastboot mode and connected successfully to the computer and there is no need to install other drivers.
Now enter the following command to flash the TWRP recovery. Replace the ‘twrp.img’ if your twrp recovery file has a different name. The twrp.img file should be in the same folder.
fastboot flash recovery twrp.img
or To temporary boot into TWRP recovery (One time)
fastboot boot twrp.img
You can use the following command to reboot. That’s not required. though, you can press “Vol + Power Up” button simultaneously to load the TWRP recovery menu.
fastboot reboot
Step 4. Flashing SuperSU.
Alright, now access the Twrp menu and choose Install > and select the location where you put the SuperSu zip file > Flash it.
Next time when you start your phone, it will have SuperSu application installed which will manage root permission to apps and things that require it.
Flashing CM13 on Redmi Note 3
A TWRP recovery is required to install the CyanogenMod ROM on your Redmi note 3 device (Twrp Link are given above in this guide).
What is required
CyanogenMod 13🙁Link is this)for Redmi note 3 (Kenzo) From the official CyanogenMod website.
OpenGapps: Choose the ARM64 > Android 6.0 > At-least Nano package. Note that the smallest opengapps package named “Pico” won’t support Fingerprint and some other setting. So burn some extra bandwidth.
A Firmware: (Optional) That you need to flash using the TWRP recovery in the starting, Though this is optional, but will ensure that you won’t face any problem installing a CyanogenMod 13 ROM on redmi note 3. This is recommended by CyanogenMod team.
Step-by-step guide
Place both files on a SD card or even inside the Internal storage if the phone is currently running. Redmi Note 3 have OTG support so in case if you don’t have an SD card we can also plug a USB drive using OTG cable.
Access the TWRP recovery, Install > Select CM ROM zip > Add another zip > Select OpenGapps Zip > Slide to flash them.
Hardly after 5 minutes, tap on the Reboot option and boot to system. The first run will take some time depending on the OpenGapps version, but onit’sts done. Choose language > Some basic phone options > Signin to google > Set Fingerprint > Done.
Issue: TWRP asks for a password to encrypt data
This is a simple thing, even if you skip this, you’d be able to flash a ZIP. But folks over the MIUI forums has a solution for it, save this Zip file and Run the .bat file. Note that this will wipe the data from your device and in case you are solely installing the CM Rom, just Wipe the “Data and Internal storage” using the TWRP recovery without entering the password.
I’ve tried to cover everything in this guide, if you feel I missed something or to suggest me, head to the comment section. I’m listening. Here the giant guide to root and unlock redmi note 3 ends. Go ahead break some eggs.

Quick note 1: When installing a CM ROM you need to install the Firmware mandatory as it will provide support for Fingerprint and lock settings.